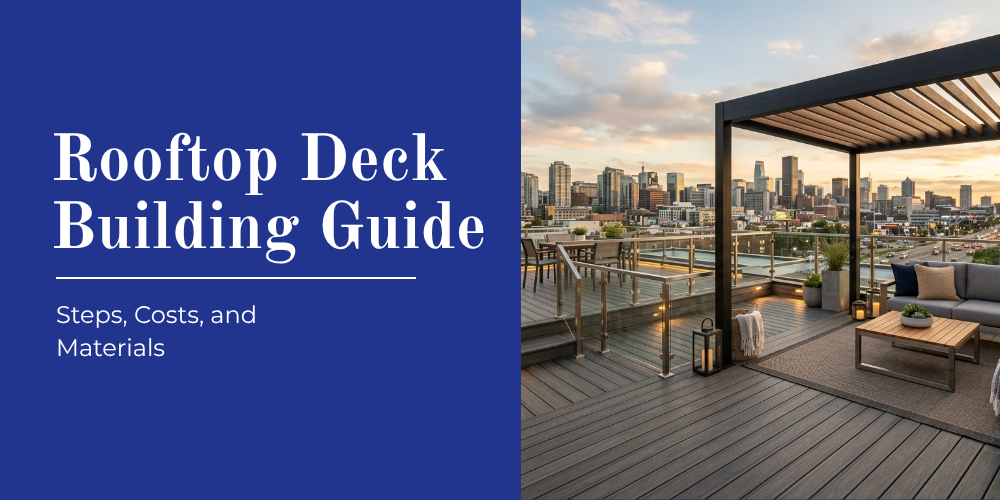
You have a flat roof sitting up there doing absolutely nothing. No views being enjoyed. No space is being used. No memories being made. A rooftop deck changes all of that. It turns wasted square footage into one of the best spots in your home. Morning coffee with a view. Summer evenings with friends. A quiet outdoor space that nobody else in the neighborhood has.
This guide covers everything you need to know before you break ground. Permits, structural requirements, waterproofing, materials, and real cost numbers. All of it, in the right order.
What Is a Roof Deck?
A roof deck is an outdoor living space built directly on top of a flat or low-slope roof. It is not a balcony. It is not a second-story patio. The roof surface itself becomes the foundation for your deck.
Done right, it adds real value to your home and gives you an outdoor living space that most people do not even think to build.
You might also hear it called a rooftop deck, a deck over a roof, or a deck on top of a roof. They all mean the same thing: an elevated outdoor space sitting on top of your structure.
How to Build a Rooftop Deck: 6 Steps
Building a rooftop deck is a process. Each step builds on the last. Skip one and you will pay for it later. Follow them in order and you will have a deck that lasts for decades.
Step 1: Check Your Permits and Zoning First
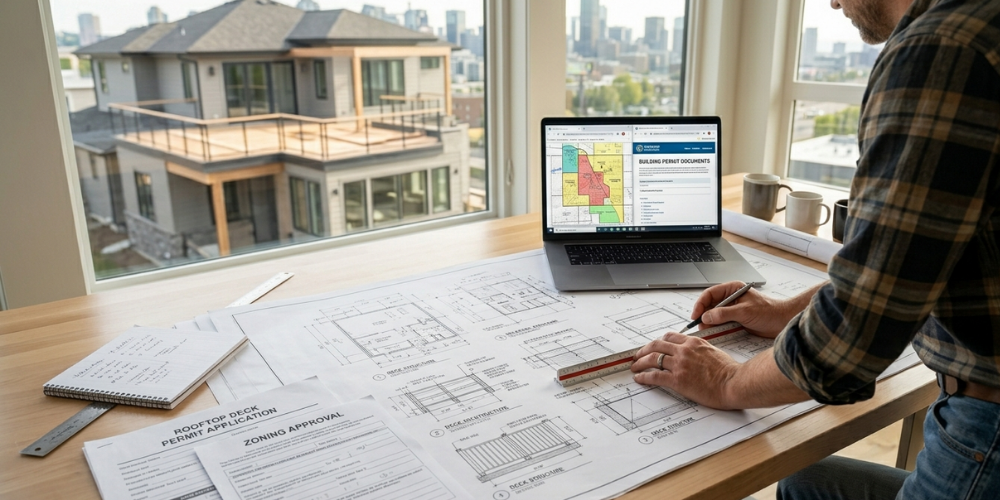
Do not buy a single board until you have done this.
Most cities require a building permit for rooftop deck construction. Under the International Residential Code (IRC), any deck 30 inches or more above grade requires a permit. Some neighborhoods have HOA rules that restrict roof decks entirely. Certain historic districts will not allow them at all.
Here is what you need to verify before anything else:
- Local zoning ordinances to confirm roof decks are allowed on your property type
- HOA rules for any height or visibility restrictions
- Building permit requirements from your local permit office
- Height limits since some areas restrict how far you can build above the roofline
Your local building department is the fastest way to get answers. One phone call usually covers most of it. You can also check permit requirements through the ICC (International Code Council), which sets the building standards most U.S. cities follow.
Pro Tip: Always pull the permit. It protects you at resale and ensures the build is up to code. Unpermitted decks create serious problems when you go to sell your home.
Step 2: Find Out If Your Roof Can Handle the Weight
This is the most important step in the entire process.
Your roof was not designed with a deck in mind. A standard residential roof handles around 20 to 30 lbs per square foot. A rooftop deck with furniture, people, and the deck structure itself needs a minimum of 55 lbs per square foot.
That gap matters. A lot.
Hire a structural engineer before you plan anything else. They will check:
- The current load capacity of your roof framing
- Whether your joists and beams need reinforcement
- Where additional support posts may be required
According to the American Institute of Architects, any structural modification to a rooftop that adds live load should be reviewed and stamped by a licensed structural engineer before construction begins. This assessment typically costs $300 to $700. It is not optional.
Pro Tip: If your engineer says reinforcement is needed, budget for it upfront. Trying to cut corners on structural work is how decks become disasters.
Step 3: Waterproof the Roof Properly
This step is what separates a deck that lasts 20 years from one that causes tens of thousands of dollars in water damage.
Your roof membrane does one job: keep water out. If it fails, water does not just sit on the surface. It works its way into your framing, your ceilings, and your walls. By the time you notice it, the damage is already done.
There are three membranes commonly used under rooftop decks:
| Membrane Type | Best For | Cost Per Sq Ft |
|---|---|---|
| EPDM (Rubber) | Most residential projects, flexible and reliable | $4 to $8 |
| TPO | High UV exposure, energy efficiency | $5 to $10 |
| PVC | Coastal areas, high moisture environments | $6 to $12 |
EPDM is the most common choice for residential roof decks. It is flexible, durable, and reliable. Long-term weathering studies by the EPDM Roofing Association found that properly installed membranes last 25 to 50 years and continue performing reliably even after three decades of service.
One rule that never changes: nothing in your deck structure should ever penetrate the membrane. Punctures cause leaks. Every single time.
Step 4: Build the Frame Using Sleepers
Once the roof is waterproofed, it is time to build the skeleton of your deck.
On a rooftop, this means sleepers. Sleepers are pressure-treated wood boards, typically 2×4 or 2×6, laid flat on top of the roof membrane. They act as the base that your decking boards fasten to.
They do not get fastened through the membrane. Instead, they sit on protective rubber pads that protect the roof surface from abrasion and spread the load evenly.
A few things that matter here:
- Drainage slope – The roof surface needs at least 1/4 inch drop per foot to move water away. Sleepers can be tapered to achieve this if your roof sits level.
- Spacing – Sleepers are typically spaced 16 inches on center
- Pedestal systems – For larger or more complex decks, adjustable pedestals give you precise leveling and better drainage beneath the boards
A properly built sleeper system keeps your deck level, lets water drain freely underneath, and gives you access to the membrane for future maintenance.
Step 5: Choose and Install Your Decking Material
Your material choice matters more on a rooftop than anywhere else on a property.
Up top, your deck sees full sun all day, moisture underneath the boards, and major temperature swings across the seasons. Not every material handles that punishment well.
Here is how the main options compare:
| Material | Durability | Maintenance | Heat Underfoot | Cost Per Sq Ft |
|---|---|---|---|---|
| Capped Composite | Excellent | Very Low | Moderate | $4 to $10 |
| Hardwood (Ipe, Cumaru) | Excellent | Medium | Low | $8 to $15 |
| PVC Decking | Very Good | Very Low | High | $7 to $12 |
| Aluminum | Excellent | Very Low | High | $10 to $20 |
Capped composite is the most popular choice for rooftop decks. It resists moisture, holds up in UV exposure, and needs very little upkeep. Make sure you choose capped composite, not uncapped. The outer shell is what protects the board from moisture absorption. For a deep look at how composite compares to other materials, read our guide on best decking materials for your home.
Hardwood like Ipe or Cumaru thrives in high-exposure environments. It stays cooler underfoot than composite in direct sun and develops a natural silver patina over time if left unfinished.
PVC and aluminum are smart choices in coastal or high-humidity environments where moisture is a constant concern.
Use hidden fasteners where possible. They give you a cleaner surface and eliminate the tripping hazard of exposed screw heads.
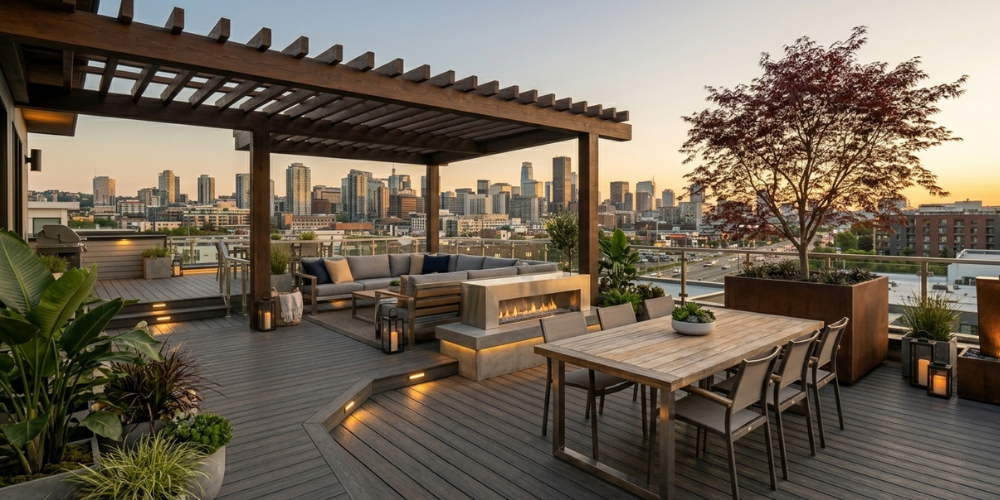
Step 6: Add Railings, Access, and Finishing Touches
The structural work is done. Now you make the space safe and actually livable.
Railings are required by code on any deck more than 30 inches above grade. On a rooftop, that is nearly every project. Aluminum and glass railings are the most popular choice up top. They are lightweight, weather-resistant, and they do not block the views you built this deck to enjoy in the first place.
Roof access needs careful planning. If you do not already have a door or hatch leading to the roof, you will need to add one. Options include a new exterior door through an upper-level wall, a roof hatch, or a dedicated staircase. Whatever you choose, it needs to be code-compliant and wide enough to actually move furniture through.
Finishing touches that make a real difference:
- Built-in bench seating along the perimeter to maximize space
- Pergola or shade structure for afternoon sun coverage
- Recessed deck lighting or post cap lights for evening use
- Planters and greenery for privacy from neighboring buildings
How Much Does a Rooftop Deck Cost?
Here are real numbers based on what we see on actual projects. Not vague estimates.
| Component | Estimated Cost |
|---|---|
| Structural engineer assessment | $300 to $700 |
| Building permits | $500 to $2,000 |
| Waterproofing membrane | $2,000 to $6,000 |
| Framing and sleeper system | $1,500 to $4,000 |
| Decking material (200 sq ft) | $2,000 to $8,000 |
| Railings | $1,500 to $5,000 |
| Roof access door or stairs | $1,000 to $4,000 |
| Total for a 200 sq ft deck | $8,800 to $29,700 |
The wide range comes down to two factors: your material choices and whether your roof needs structural reinforcement.
A simple composite deck on an already sound roof sits on the lower end. A hardwood deck requiring joist reinforcement, a new access staircase, and glass railings pushes toward the higher end.
Pro Tip: Get at least 3 contractor quotes. Rooftop deck construction is specialized. Not every deck builder has experience with waterproofing systems and structural load requirements. You want someone who builds these regularly.
Frequently Asked Questions
Can any flat roof support a deck?
Not without a proper assessment. A structural engineer needs to evaluate your roof before you build. Most residential roofs handle 20 to 30 lbs per square foot. A rooftop deck requires at least 55 lbs per square foot. Reinforcement is often needed, and skipping this step can be dangerous.
How do you build a deck over a roof without causing leaks?
The answer is a properly installed waterproof membrane combined with a floating deck structure that never penetrates the surface. Sleepers rest on rubber pads without being fastened through the roof. This is the most technically demanding part of the project and the main reason why hiring an experienced contractor is so important.
What is the best decking material for a rooftop deck?
Capped composite is the best all-around choice for most homeowners. It handles moisture, UV exposure, and temperature changes well with minimal maintenance. For a premium look, hardwoods like Ipe and Cumaru perform extremely well in the harsh rooftop environment. Avoid uncapped composite and untreated wood entirely.
Do I need a permit to build a rooftop deck?
In almost every city and county, yes. Permits are required for rooftop deck construction. Zoning rules and HOA restrictions may also apply. Always check with your local building department before starting any work.
Ready to Build Your Rooftop Deck?
A rooftop deck is one of the smartest investments you can make in your home. But it is also a project that demands real expertise at every stage. Get the structural assessment, waterproofing, and framing right and you will have a deck that performs for 20 to 30 years without issues.
At French’s Custom Outdoor Concepts, we build custom decks across the San Antonio area, including full rooftop deck construction. If you are ready to turn your flat roof into an outdoor living space, reach out to our team for a free consultation. We will walk you through the whole process from day one.